
Seven top tips for an amazing pumpkin carving
You only have to look around to see trees with their warm oranges and reds and fallen leaves to know that autumn is here. And as Halloween approaches many will be looking to decorate their home, whether that is with a seasonal wreath and a couple of pumpkins for a more elegant approach, or full-on horror movie extravaganza. There is no doubt that a lot of fun can be had through pumpkin carving for the whole family, and at NEXA we are no carving experts, but we love a challenge. So, in a quest to improve our personal skills our team have gathered some fantastic top tips for carving an amazing pumpkin.
1. Make sure it has a stem
Pumpkin fields are fantastic places, and if you get to go to a farm that has a pumpkin field you will not be disappointed. Pumpkins grow on vines and rest on the ground; their stem is more decorative than it is practical and is not meant to support its weight. Therefore, if you see a pumpkin without a stem it means it has been mishandled and will not be in the best of conditions. You want to make sure you choose a fresh pumpkin so you need to look for one that has a greenish stem. If the stem is big and thick this could indicate that that the walls of the pumpkin could be thick as well, which is great for carving.

2. Doesn’t have to be perfect
You may be looking for the perfect-looking pumpkin for your home decoration, but don’t dismiss the imperfect, especially those weirdly shaped ones. We know many people like to choose the perfect pumpkins but you can have so much fun with those that are strange shapes and sizes, they can inspire some fun carving designs, and are always memorable!
3. Don’t rush in
We know how much you want to start carving as soon as you have the pumpkin home, but from the advice we have read we would suggest you wait. You have to remember that a pumpkin is perishable, so as soon as you cut into it the decomposition process starts. Experts suggest that you wait until you are waiting to display it, so if you are carving your pumpkin ready for a Halloween party, carve it the night before so it is fresh and in the best condition.
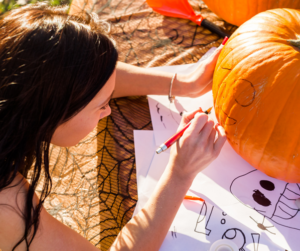
4. Have a plan
Talking as a team, none of us has had a carving plan before and just started hacking away to create some ‘interesting’ pumpkin designs, but this year we have decided that each of us is going to have a plan of what we are going to create before we cut. You can get inspiration from the internet and print off your favourite idea, so you can draw that onto your pumpkin first before you make your first cut.
One top tip is to have a bottle of water spray handy as you are carving because as soon as you start to cut into it your pumpkin is losing moisture. If you keep it hydrated it will keep it moist and easier to work with!
5. Leave the top on
Aesthetically, you would want to leave the top on your pumpkin, but also when you remove it, it can effect its structural integrity. When carving we know most of us cut off the top to empty our pumpkins, but there is a better alternative. Avoid cutting the bottom, as pumpkins lose a lot of water when you cut into them and you don’t want that liquid dripping out all over your worktop. It is advised that you cut a hole in the back of the pumpkin, as this way you won’t affect the pumpkin’s structure or have a messy kitchen.
6. What to scoop
Yes, scooping out your pumpkin is a messy and fun job, but how much should you scoop? You don’t want to leave any bits inside because they are going to go mouldy and that will start spreading across the walls of your pumpkin and it may start to collapse. Scrape the walls so that you get every last little stringy thing out; this will also make the walls drier and will help your pumpkin last a bit longer.

7. Use a battery candle
To make sure your pumpkin is looking its best for longer you want to keep it as cold as possible. Therefore, if you place a tealight candle inside it the heat will start to cook the pumpkin, so how about using a battery-powered candle instead? Not only is it safer but will aid the longevity of your amazing pumpkin design.
Happy Halloween
We can’t wait to see the pumpkin designs you make as we are out on viewings, but we would also love it if you would send us your photos, too. However you decide to celebrate Halloween this year, we hope you have a wonderful time. And should your house give you the spooks, contact us today so we can find you a home for all seasons.